The Problem:
There are cinder blocks that are supporting the asphalt next to the cement garage apron and the sand and dirt in the holes in the blocks erode away. This is due to builders taking shortcuts by not properly filling the holes in and also by improper drainage of water away from the house which erodes the sand away from under the blocks (from the previous owner who never cleaned the gutters....)
The Expensive Solutions:
The asphalt began to sink last summer and not knowing how to repair it, I called for many quotes. Most asphalt companies wanted $600 to repair it by taking out a 3ft section and filling it all in. They said it may not completely solve it and the whole thing may need to be replaced eventually. I called a concrete guy next to see how much it would be to put in a concrete driveway. He was quoting around $3300 which was cheaper than a whole asphalt driveway. If or when I need to replace the whole thing, I'm going concrete.
Temp Fix #1:
For a temporary fix, I used some driveway blackjack stuff to seal up the space between the asphalt and the cement for a quick fix before winter to keep water from freezing and doing some major damage.
Temp Fix #2 (only temporary until I need to replace the whole driveway):
Fast forward one year and I'm thinking that fix might hold again but nope I drove over the apron two weeks ago and a chuck about the size of a softball fell through. Now I have a major problem that needs to be fixed before winter, and I'm not putting $3k down for a new driveway with the holiday's coming up.
So here's what I did:
Step 1: Use a hammer to remove the remaining sunken areas along the apron.
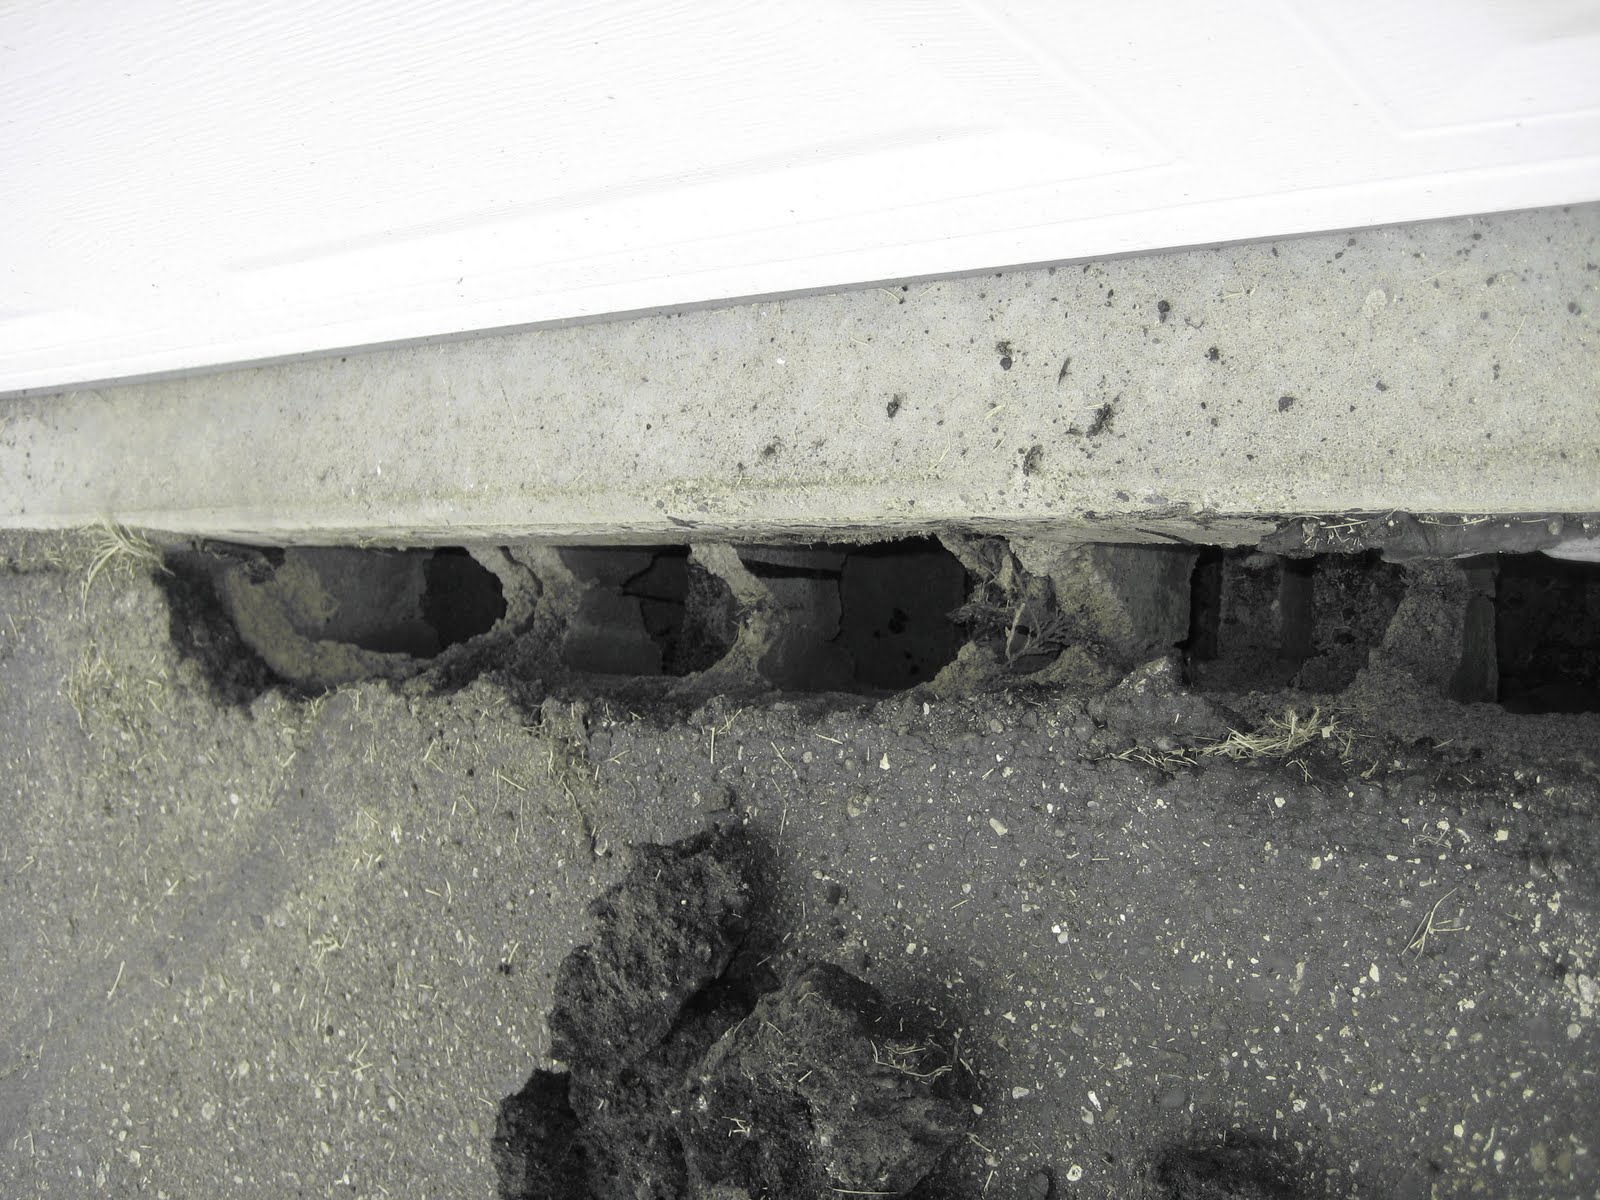
See the 3ft deep holes in between the cinder blocks? This is bad. This step took about 2 hours with a hammer, chisel, and a superbar.
Step 2: Fill in the holes with class 5 gravel, pack down as best possible, then fill with crushed limestone.

I used a 1"x1"x5ft long pine board to tamp the class 5 gravel down. I filled about 4" then tamped. It was the longest part of the process and the most grueling. I went though about 1/2 cubic yard of class 5. On top of the class 5, I used some larger crushed limestone, tamped it down and left about 1" to 1.5" of space from the top which would be used to put the asphalt patch in. This was all found at our local gardening and landscape center, much cheaper than buying bags of stuff from a home improvement retailer. Afterwards, I sprayed water over the apron and the freshly laid rocks to clean off dirt and provide a better surface for the cold asphalt patch to adhere to. I also figured the large limestone rocks would be less dusty than the class 5 gravel and having large chucks to support the asphalt patch. This whole step took about 3 to 4 hours including trips to the store.
Step 3: Fill int he rest with cold asphalt patch.

This stuff is nasty. It's sticky, and gets everywhere. Use gloves and pour some into the hole, stopping every 1" of depth to tamp down with a 2"x4" board turned on its side. I had some fantastic help from my wife who scooped this out of the bag with a wood shim while I held the bag and massaged the pebbles of patch up to the spout we cut from a corner. This step took about an hour.
I need to have the whole driveway sealed (previous owner never did that either...) so this was an important repair to get done before I have it sealed.
Just very glad to have this project done. The beers are tasting very good right now. Now to relax for the rest of the Labor day weekend!